
This procedure ensures proper function, efficiency, and longevity of the compressor by performing basic monthly maintenance: checking and refilling oil, draining water, and inspecting the air filter. Please refer to this VIDEO for further help.
It is recommended that a Monthly Compressor Maintenance Log is kept and updated or a machine tag is kept on the compressor:

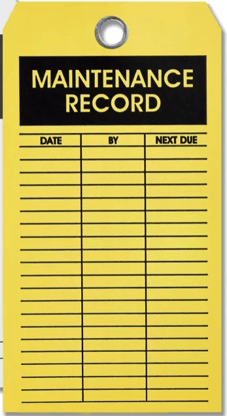
A template Monthly Compressor Maintenance Log can be downloaded here
🔧 Tools & Supplies
-
Lint-free wipes
-
Oil (approved type from manufacturer)
-
Crescent wrench
-
Allen wrench (for filter assembly)
-
Flashlight (optional, for visual inspection)
-
Maintenance log
⚠️ Warnings
-
Always power off and depressurize the compressor before maintenance.
-
Orange or very dirty water may indicate a major internal issue—report this immediately.
-
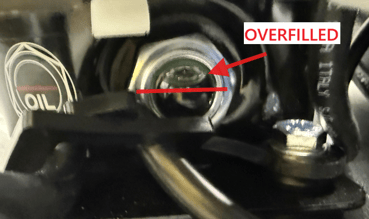
Do not overfill oil past the halfway point of the sight bubble.
✅ Step-by-Step Instructions
- Note the Compressor Pressure
- Note the current compressor pressure at both the instrument gauge and the compressor gauge itself to ensure there are no anomalies

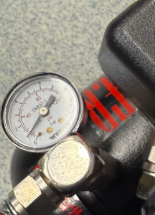
- Typical ranges at instrument: 0.30 -.040MPa (43-58 psi)
- Typical ranges at the Compressor: 0.41 MPa-0.55MPa (60-80 psi)
Note: The compressor must always supply more pressure than the instrument is demanding otherwise it will behave as if it has a leak in the compressor air system.
- Note the current compressor pressure at both the instrument gauge and the compressor gauge itself to ensure there are no anomalies
-
Run SHUT DOWN Sequence
- In the software go to the Manual Control Screen

-
Follow all on-screen prompts until the liquids are in their respective bottles.
-
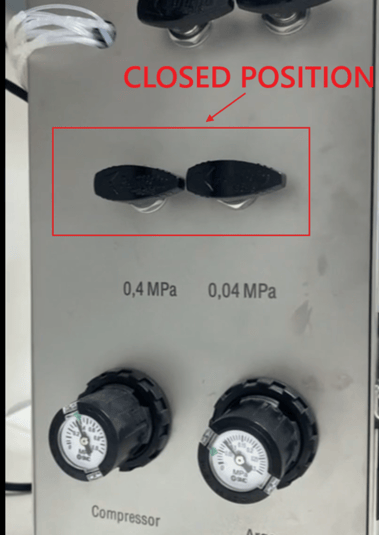
Double check to make sure no fluid remains in the liquid lines or waste lines.
-
Once the lines are dry, close the Argon and Compressor Pressure turn Valves.
WARNING: FAILURE TO DO THIS CORRECTLY COULD LEAD TO CROSS CONTAMINATION OF REAGENTS. NEVER TURN OFF COMPRESSOR PRESSURE UNTIL ALL BOTTLES HAVE BEEN DEPRESSURIZED
- In the software go to the Manual Control Screen
-
Power Down and Vent System
-
Turn off the compressor using the main switch.
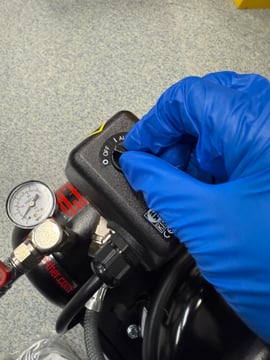
-
If needed, open the manual ventilation valve to release trapped pressure.
-
-
Check Oil Level
-
Locate the oil sight bubble (usually on the compressor’s right side in North American builds).
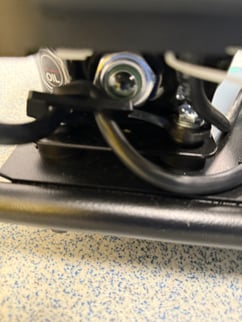
-
The oil should be at the halfway mark of the bubble.
-
If low, continue to the next step
-
-
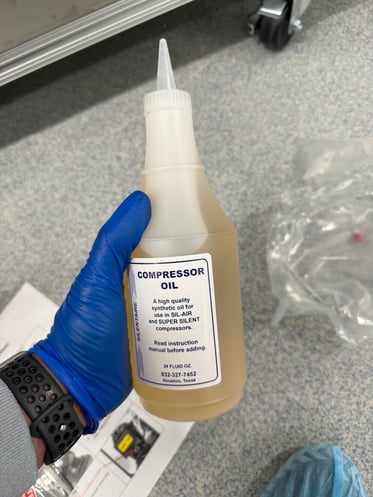
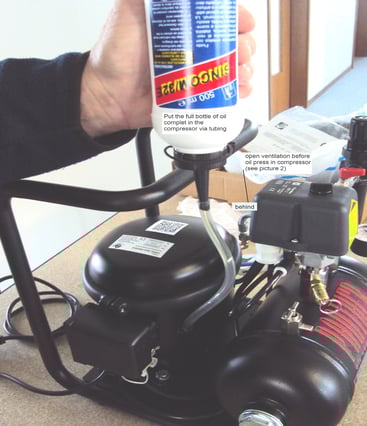
Add Oil (If Necessary)
-
Use the compressor oil that came with the Compressor if available but standard air compressor oil from a hardware store will suffice.
-
Remove the oil cap and slowly add oil using a clean funnel or tubing.
-
Watch the bubble closely—stop filling once halfway full.
-
Close the oil cap and secure it.
-
-
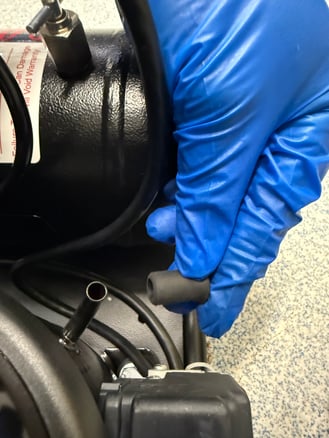
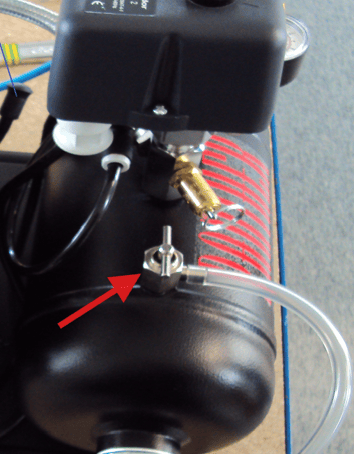
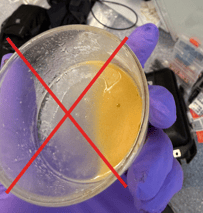
Drain Water Trap
-
Locate the water trap release valve
-
Place a container to collect any water or residue under the tube connected to the valve
-
Open the drain valve to release any water or residue into the collection vial
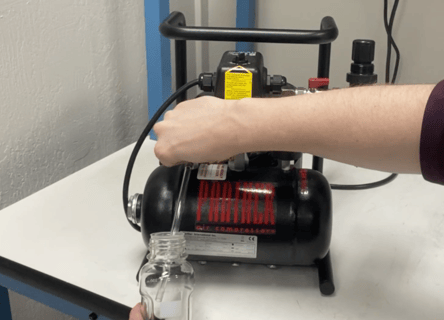
- Close the valve once fully drained.
-
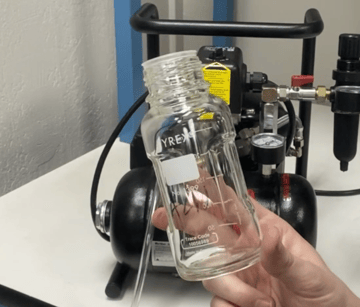
Inspect the drained water:
-
Clear or slightly cloudy – Normal
-
Orange, rusty, or sludgy – Flag this in the log and notify service immediately because if it is excessive you will likely need a new compressor.

-
-
-
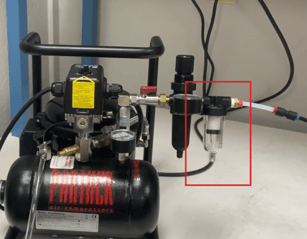
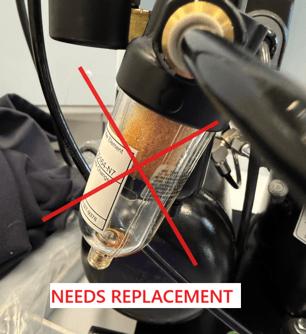
Inspect Filter and Tubing
-
Visually check the air filter for dirt or damage. The filter should be either white or green. Replace if you see discoloration.
-
Inspect compressor tubing for clogs, damage, or improper positioning.
Consider replacing the tubing if the compressor filter was very discolored as particulates or oil may have gotten into the tubing
-
-
Record & Report
-
Log oil level, water condition, and filter status in the monthly maintenance log.
-
Note any issues or anomalies and alert Sierra BioSystems
-