Setting up a new computer to control your K&A synthesizer? This guide walks you through the full installation of the K&A NextGen software — including network setup, software installation, and database configuration.
🧰 Tools & Requirements
-
Windows PC with admin access
-
Ethernet cable (for direct connection to the instrument)
-
Latest version of
KA_Labs.exe(e.g.,KA_Labs0.0.16.6.exe) -
KA Labs 0.0.16.6. April 16 2026.kbffile or whatever the current backup file is -
Internet access (optional but helpful)
⚠️CAUTION
We recommend creating a backup of your current settings if you're moving from one computer to another. Here is an article on how to perform a backup or restore: How to Perform a Backup or Restore on the Synthesizer Software
🛠️ Step-by-Step Installation Instructions
1. Set Up Network Communication
If you are installing this software on a computer for simulation reasons and it will not be connected to an instrument this step can be skipped and you can proceed to 2. Install the Software.
To enable communication between the PC and synthesizer:
-
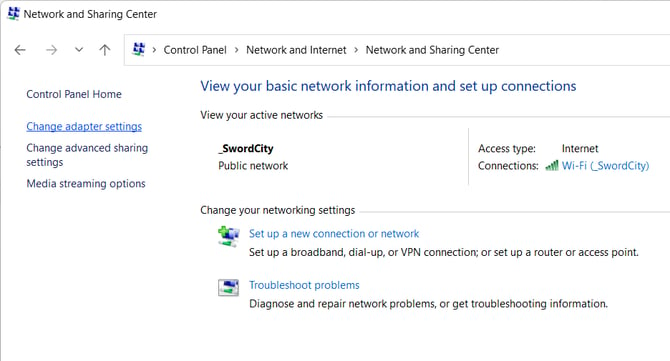
Open Control Panel > Network and Sharing Center
-
Click Change adapter settings
-
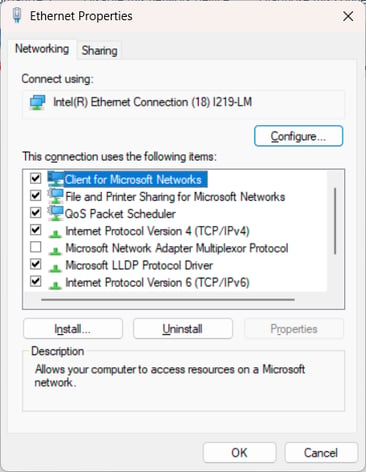
Right-click your Ethernet adapter > Properties
-
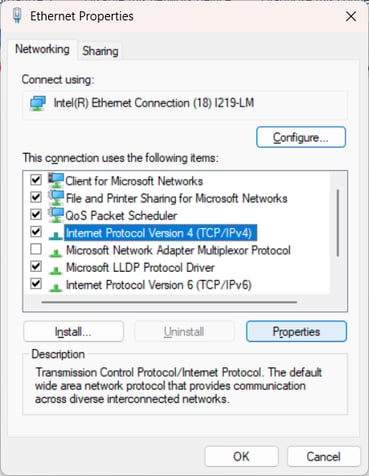
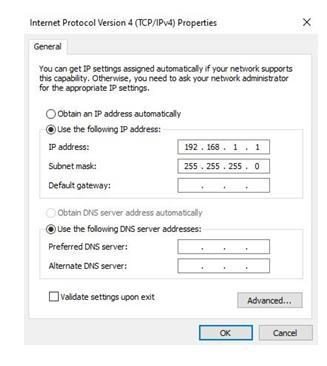
Select Internet Protocol Version 4 (TCP/IPv4) > Properties
-
Enter the following:
-
IP Address:
192.168.1.1 -
Subnet Mask:
255.255.255.0 -
Leave all other fields blank
-
-
Click OK
📘 For more detail: How to Set up Network Communication
2. Install the Software
-
Make sure the synthesizer is powered on and connected via Ethernet
-
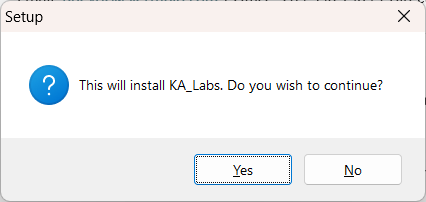
Run the
KA_Labs0075.exe( or latest )installer -
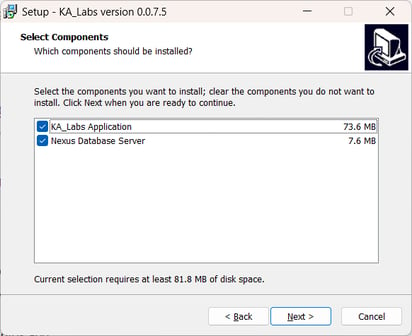
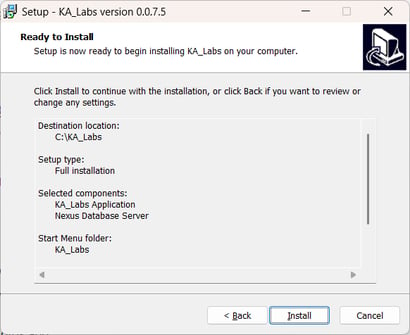
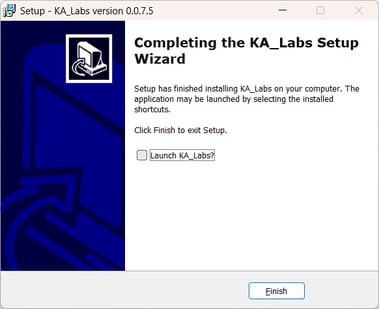
Proceed through the install wizard
-
Uncheck the box to launch KA Labs after installation
3. Configure the Database
-
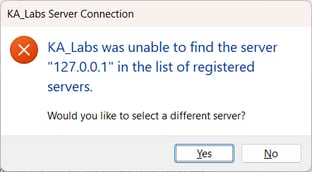
Launch the updated KA_Labs software
-
You’ll see a prompt to select a different server
-
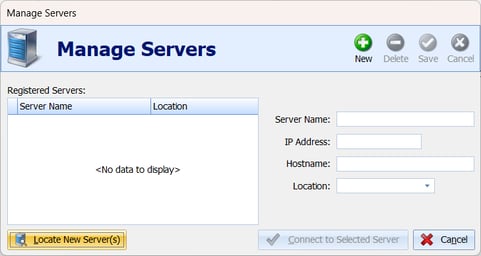
Click Locate New Server(s)
-
Click the green plus icon to add a new server
-
Enter the following:
-
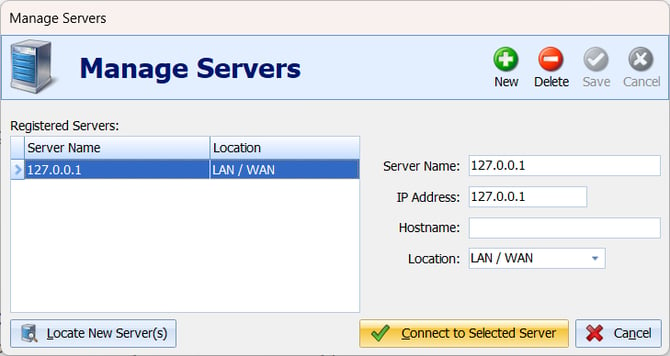
Server Name:
127.0.0.1 -
IP Address:
127.0.0.1 -
Hostname: Leave blank
-
Location: Select LAN / WAN
-
-
Click Connect to Selected Server
-
A green light in the control panel confirms successful connection
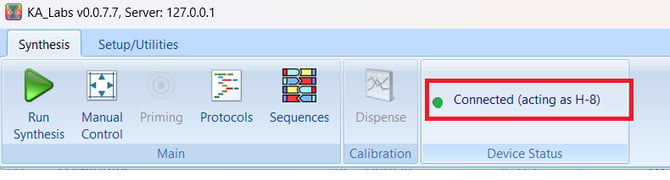
4. Restore Factory Settings
-
In the software, go to Setup/Utilities > Backup/Restore

-
Click Restore
-
Browse for and select
KA_Factory_Settings_Backup.kbf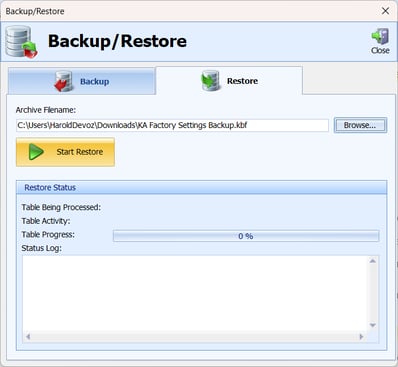
-
Complete the restore process
✅ The software is now ready to use.
5. Power & Energy Settings
- Check all network adapters (instrument NIC and any secondary USB-Ethernet or Wi-Fi adapters) in Device Manager → Network Adapter → Power Management.
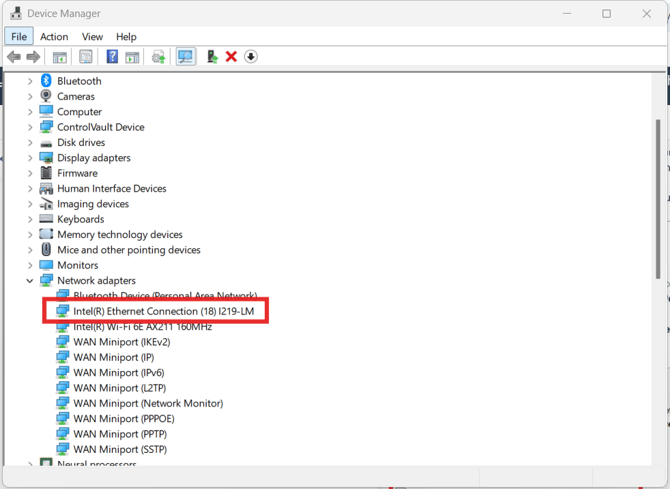
- If the option “Allow the computer to turn off this device to save power” is present, uncheck it.
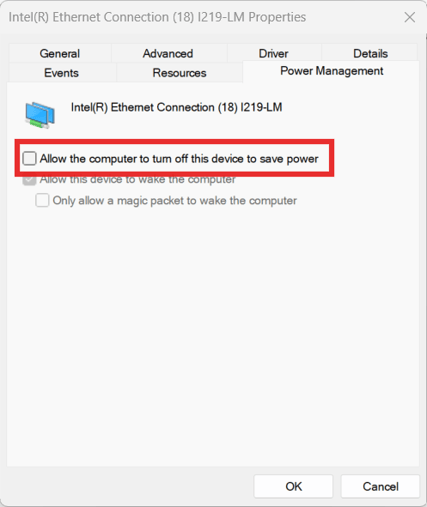
- If the option is not available, no action is required for that adapter.
- For the instrument NIC, disabling power saving is critical to prevent dropped communication during synthesis.
- For secondary adapters, disabling power saving ensures stable file share access, backups, and remote connectivity.
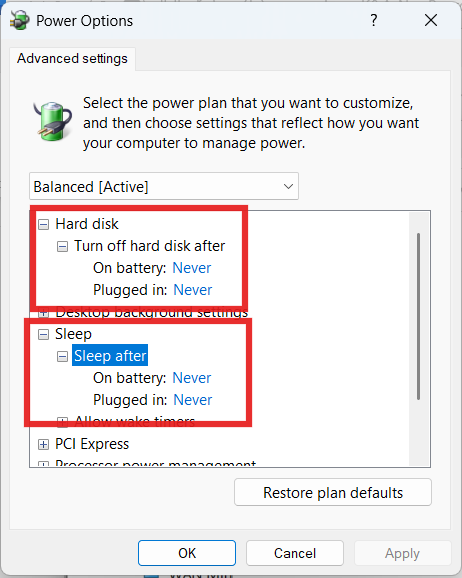
- In Advanced Windows Power Options, set:
- Sleep: Never
-
- Hard disk: Never turn off during operation
- Hard disk: Never turn off during operation
6.File Locations & Standard-User Access
Where the software is installed
- The Shasta folder can be installed anywhere on the PC. Traditionally it is placed directly on the C: drive (e.g.,
C:\Shasta\), but it works equally well insideC:\Program Files (x86)\. The install location does not affect functionality. - The local database runs separately under
C:\ProgramData\NexusDB3\(a hidden folder). This is managed by the NexusDB Server V3 service, not by the user.
Standard-user (non-admin) access
- Normal day-to-day operation does not require administrator rights. Standard users can launch the software and run syntheses normally, because the NexusDB Server V3 service handles all live database activity at the system level.
- Backup and Restore functions benefit from administrator rights. Without elevated rights, a standard user may be unable to run a backup or restore. This is not needed for routine operation, but it does make troubleshooting more difficult if support ever needs a backup pulled.
- Recommendation for IT: Whitelist the install folder and
C:\ProgramData\NexusDB3\so the software is not blocked by endpoint security, and grant the standard-user account elevated rights (or local admin) if you want lab users to be able to perform their own backups. Otherwise, backups can be handled during a service/support session.
7. Security & Whitelisting
- Whitelist the following executables and services in antivirus/firewall policies:
Shasta.exe(orKA_Labs.exe)NexusDB Server V3service
- Administrator rights are not required for normal day-to-day operation. They are only needed for installation, updates, and the software's Backup/Restore functions.
⚠️ Warning: Without rights to write to
C:\ProgramData\NexusDB3\and the backup folder, users will not be able to save backups or use restore, which complicates troubleshooting.
8. Backups
Refer to this article: How to Perform a Backup or Restore
- The End User should Back up the software settings, methods, and log data regularly.
- Store backups on:
- A company file share (via second NIC or Wi-Fi adapter), or
- An external USB drive if offline.
9. Windows Updates
- Windows Updates cannot be controlled by Sierra/K&A.
- Updates must be scheduled by IT outside of synthesis runs to prevent costly interruptions.
- Apply updates during planned downtime or after synthesis jobs complete.
- Restarting the computer occasionally can help prevent forced updates
🧯 Server Connection Troubleshooting
If the software can’t connect to the server:
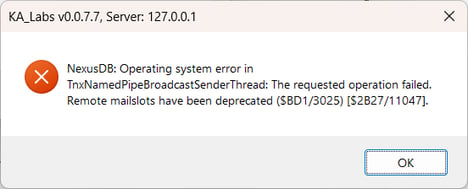
-
Press
Win + R, typeservices.msc, and press Enter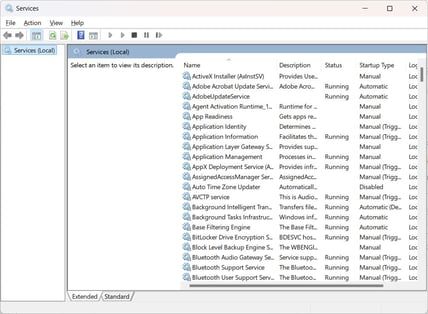
-
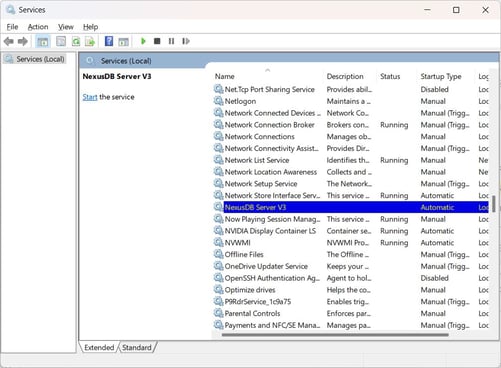
Locate NexusDB Server V3
-
If not running, right-click > Start
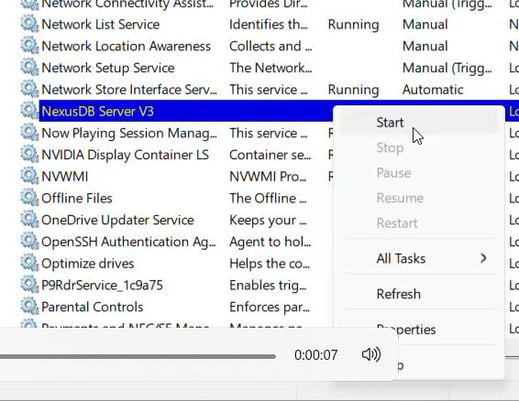
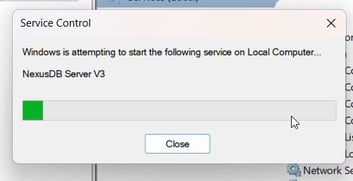
- Attempt to run K&A Software again
Still not working?
-
Stop the NexusDB service by following the steps above
-
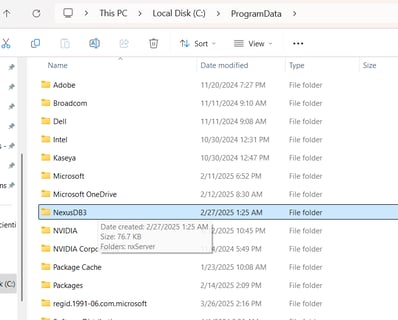
Navigate to
C:\ProgramData(you may need to show hidden files) -
Delete the NexusDB3 folder
-
Restart the NexusDB Server and try again