
Flangeless fittings make a reliable, low-dead-volume connection without flaring or flanging the tubing. They are reusable and are designed to stay tight through tubing twist and instrument vibration. A good seal depends on assembling the three parts in the correct order and orienting the ring and ferrule correctly before you tighten.
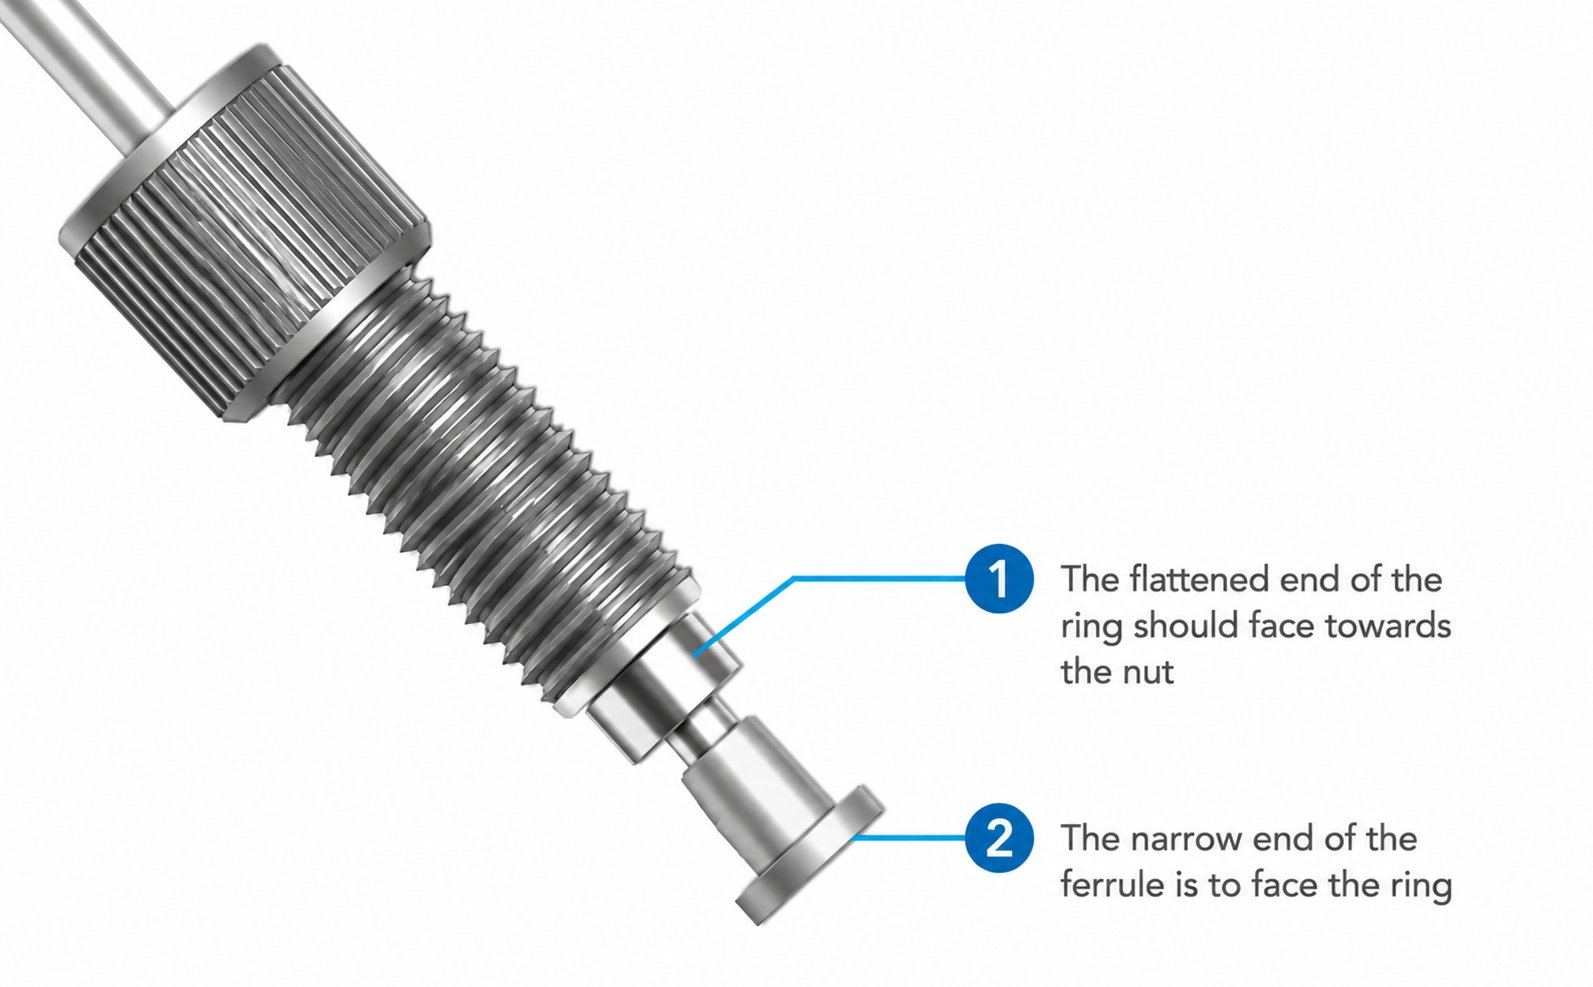
The flattened end of the ring (1) faces the nut, and the narrow end of the ferrule (2) faces the ring.
What you will need- The three fitting components: the nut, the compression ring, and the ferrule
- A clean length of tubing cut squarely, with no burrs or angled ends
- The receiving port on your instrument or manifold
- Slide the parts onto the tubing in order: the nut first, then the compression ring, then the ferrule.
- Position the compression ring so its flattened end faces the nut (point 1 in the image above).
- Position the ferrule so its narrow end faces the ring (point 2 in the image above).
- Insert the tubing and fitting into the port. Hold the tubing firmly against the bottom of the port so it cannot back out while you tighten.
- While keeping that pressure, thread the nut into the port and tighten it comfortably finger-tight. Do not use a wrench or pliers.
The two orientations that make the seal
- The flattened end of the ring faces the nut.
- The narrow end of the ferrule faces the ring.
If either part is reversed, the fitting will not seal correctly.
- Cut tubing squarely. An angled or ragged end is the most common cause of a leak.
- Keep the tubing bottomed out in the port the entire time you tighten. Letting it slip back leaves a dead volume that can leak or trap sample.
- Finger-tight is enough. Over-tightening or using tools can deform the ferrule or strip the port and will not improve the seal.
- These fittings are reusable. The ferrule and ring stay set on the tubing once seated, so you can disconnect and reconnect without replacing parts.
| What you see | What to check |
|---|---|
| Leak at the port | Confirm the ring and ferrule are oriented correctly, then re-seat the tubing to the bottom of the port and re-tighten finger-tight. |
| Leak even after re-seating | Inspect the tubing end. Re-cut it squarely if it is angled, nicked, or flared. |
| Nut will not snug up | Make sure the parts went on in the right order (nut, then ring, then ferrule) and that you are threading into the matching port. |
| Repeated leaks | Replace the ferrule and ring with a fresh set on a clean length of tubing. |
Questions about fittings or tubing for your system? Contact Sierra BioSystems field service for assistance.