
🧰 Tools & Requirements
-
Windows PC
-
Admin access to the PC
-
Ethernet cable (direct connection from PC to instrument)
-
K&A or Shasta software installed
-
Instrument must be powered on
🛠️ Step-by-Step Network Setup Instructions
1. Connect the Ethernet Cable
Plug one end into the synthesizer and the other directly into the PC’s Ethernet port.
If you have multiple ethernet ports on your computer make sure that the Ethernet cable is connected to the one whose static IP address is established in the following steps
2. Open Network Settings
-
Go to Control Panel > Network and Sharing Center
-
On the left, click Change adapter settings

3. Edit the Ethernet Adapter Properties
-
Right-click your Ethernet adapter (not Wi-Fi) and choose Properties
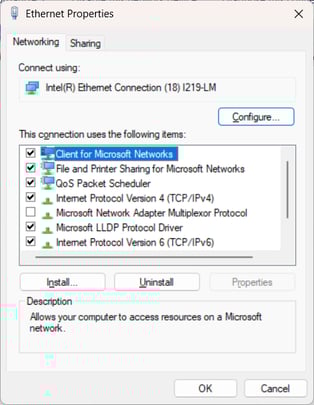
-
Scroll and select Internet Protocol Version 4 (TCP/IPv4)
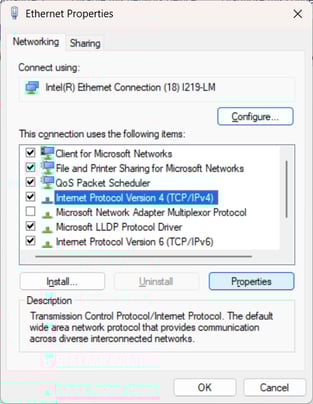
-
Click Properties
4. Set a Static IP
Manually configure the IP settings as follows:
| Setting | Value |
|---|---|
| IP Address | 192.168.1.1 |
| Subnet Mask | 255.255.255.0 |
| Default Gateway | (leave blank) |
| DNS Servers | (leave blank) |
-
Click OK and then Close
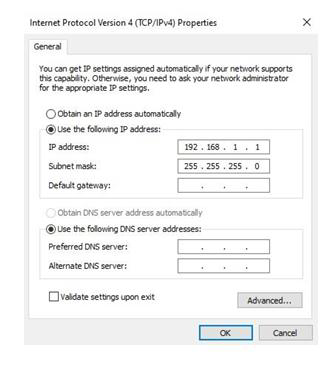
✅ This IP configuration allows the PC to communicate with the K&A synthesizer’s built-in network controller.
5. Test Communication
-
Power on the synthesizer.
-
Open the K&A Labs software.
-
Look for a green light on the software’s control panel—this indicates successful communication.

🧯 Troubleshooting Tips
No green light?
-
Double-check your Ethernet cable connection.
-
Make sure the instrument is powered on.
-
Reboot the PC after setting the IP.
-
Try replacing the Ethernet cable or using a different port.