
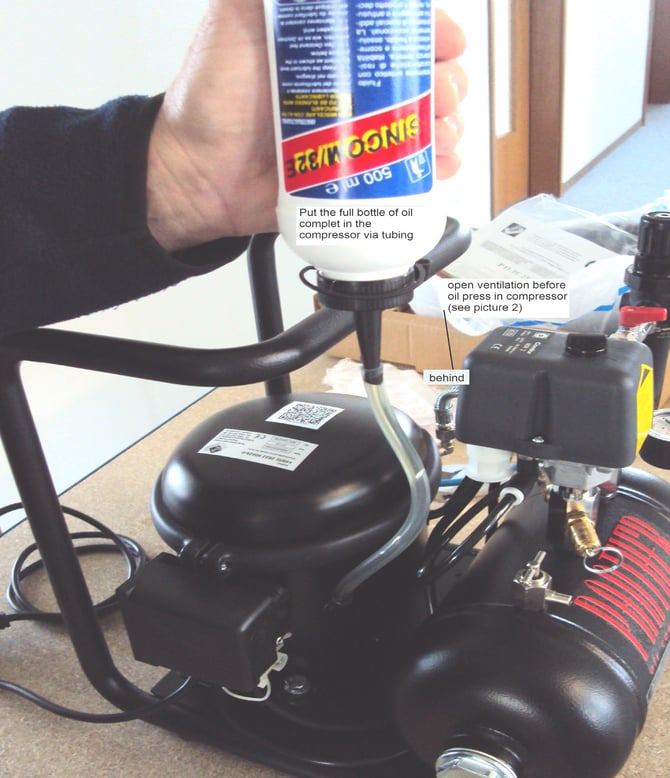
Step 1: Add Compressor Oil
-
Locate the oil fill side of the compressor:
-
European units: Typically use the left side.
-
North American units: Typically use the right side.

-
-
Use the included oil bottle:
-
Pour oil slowly into the designated oil container.
-
Watch the bubble level on the side of the compressor.
-
Stop when the bubble is halfway full. This usually takes about 70–80% of the bottle.
-
⚠️ Do not overfill. Overfilling can damage the compressor.
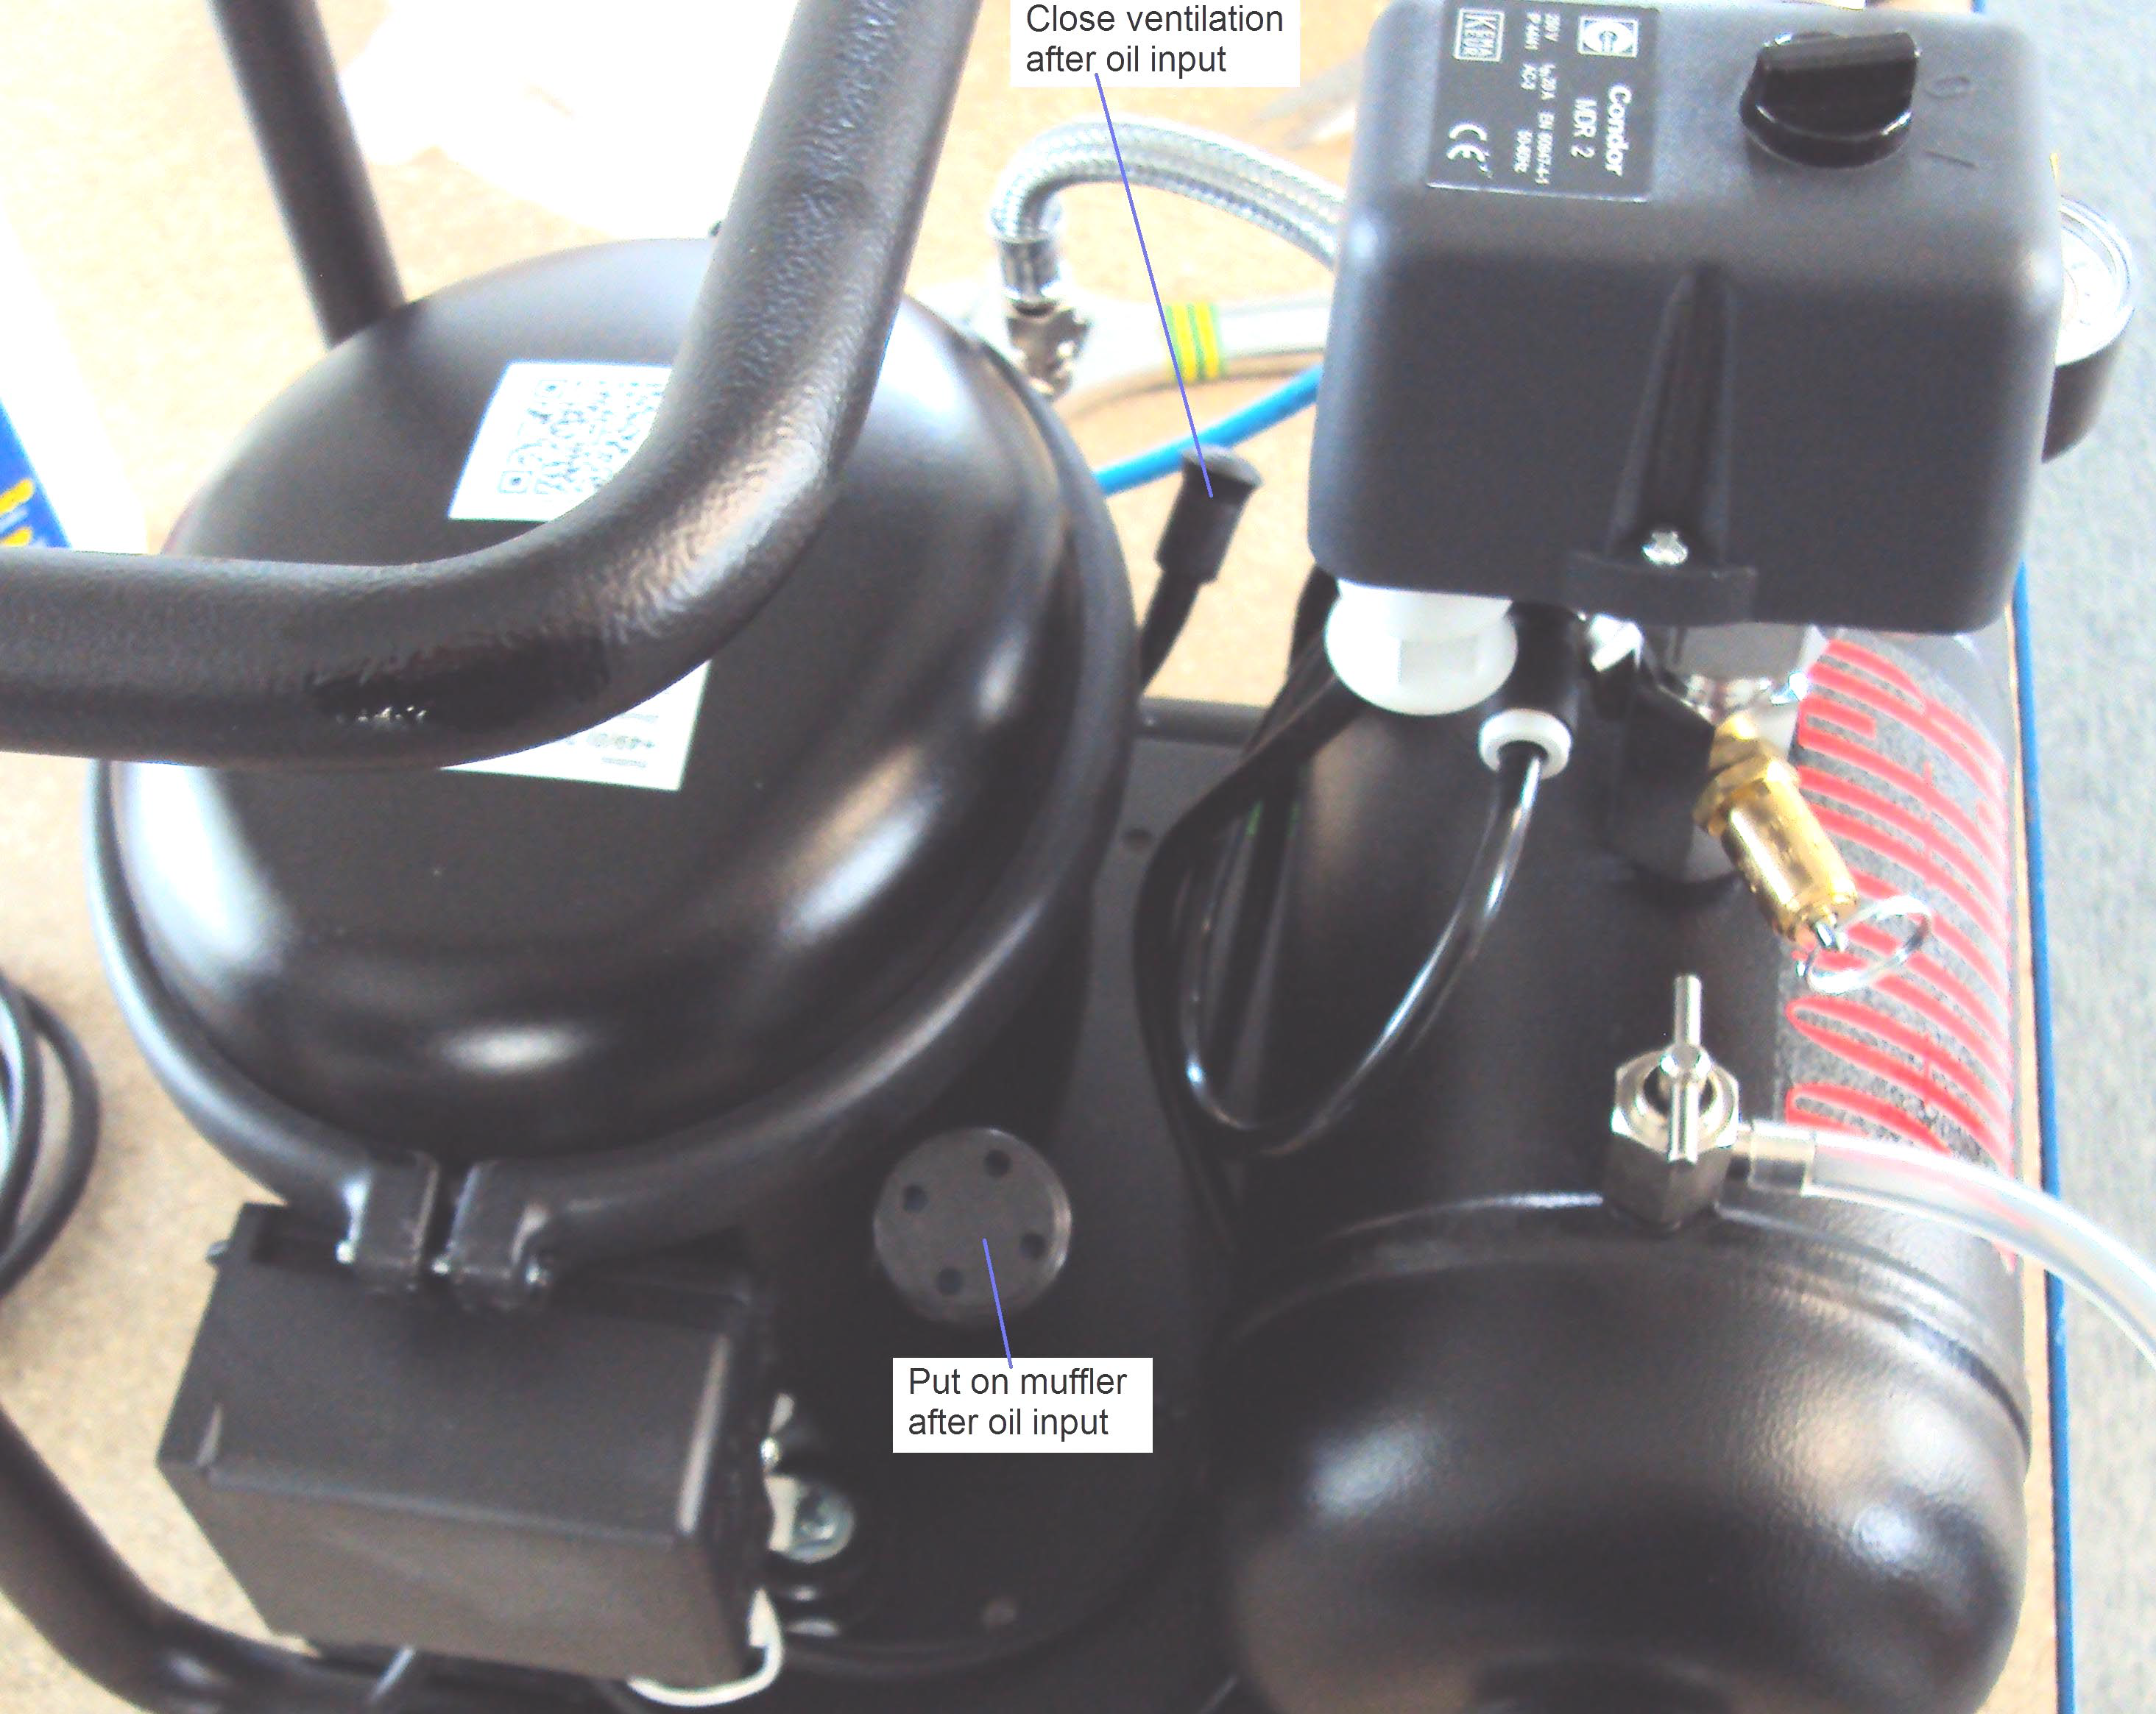
Step 2: Connect the Tubing
Follow the layout in the compressor schematic:
-
Attach the silicone water removal tube to the designated port.
-
Close the Vent output securely.
-
Install the muffler for noise reduction.
Step 3: Install the Regulator & Filter Assembly
-
Apply Teflon tape to the ¼” NPT-to-6mm fitting (included in your parts bin).
-
Thread the fitting into the regulator/filter:
-
Use an Allen wrench in the fitting body for better control.
-
-
Attach the regulator/filter assembly to the compressor using a crescent wrench.
-
Ensure a snug and airtight fit.
-
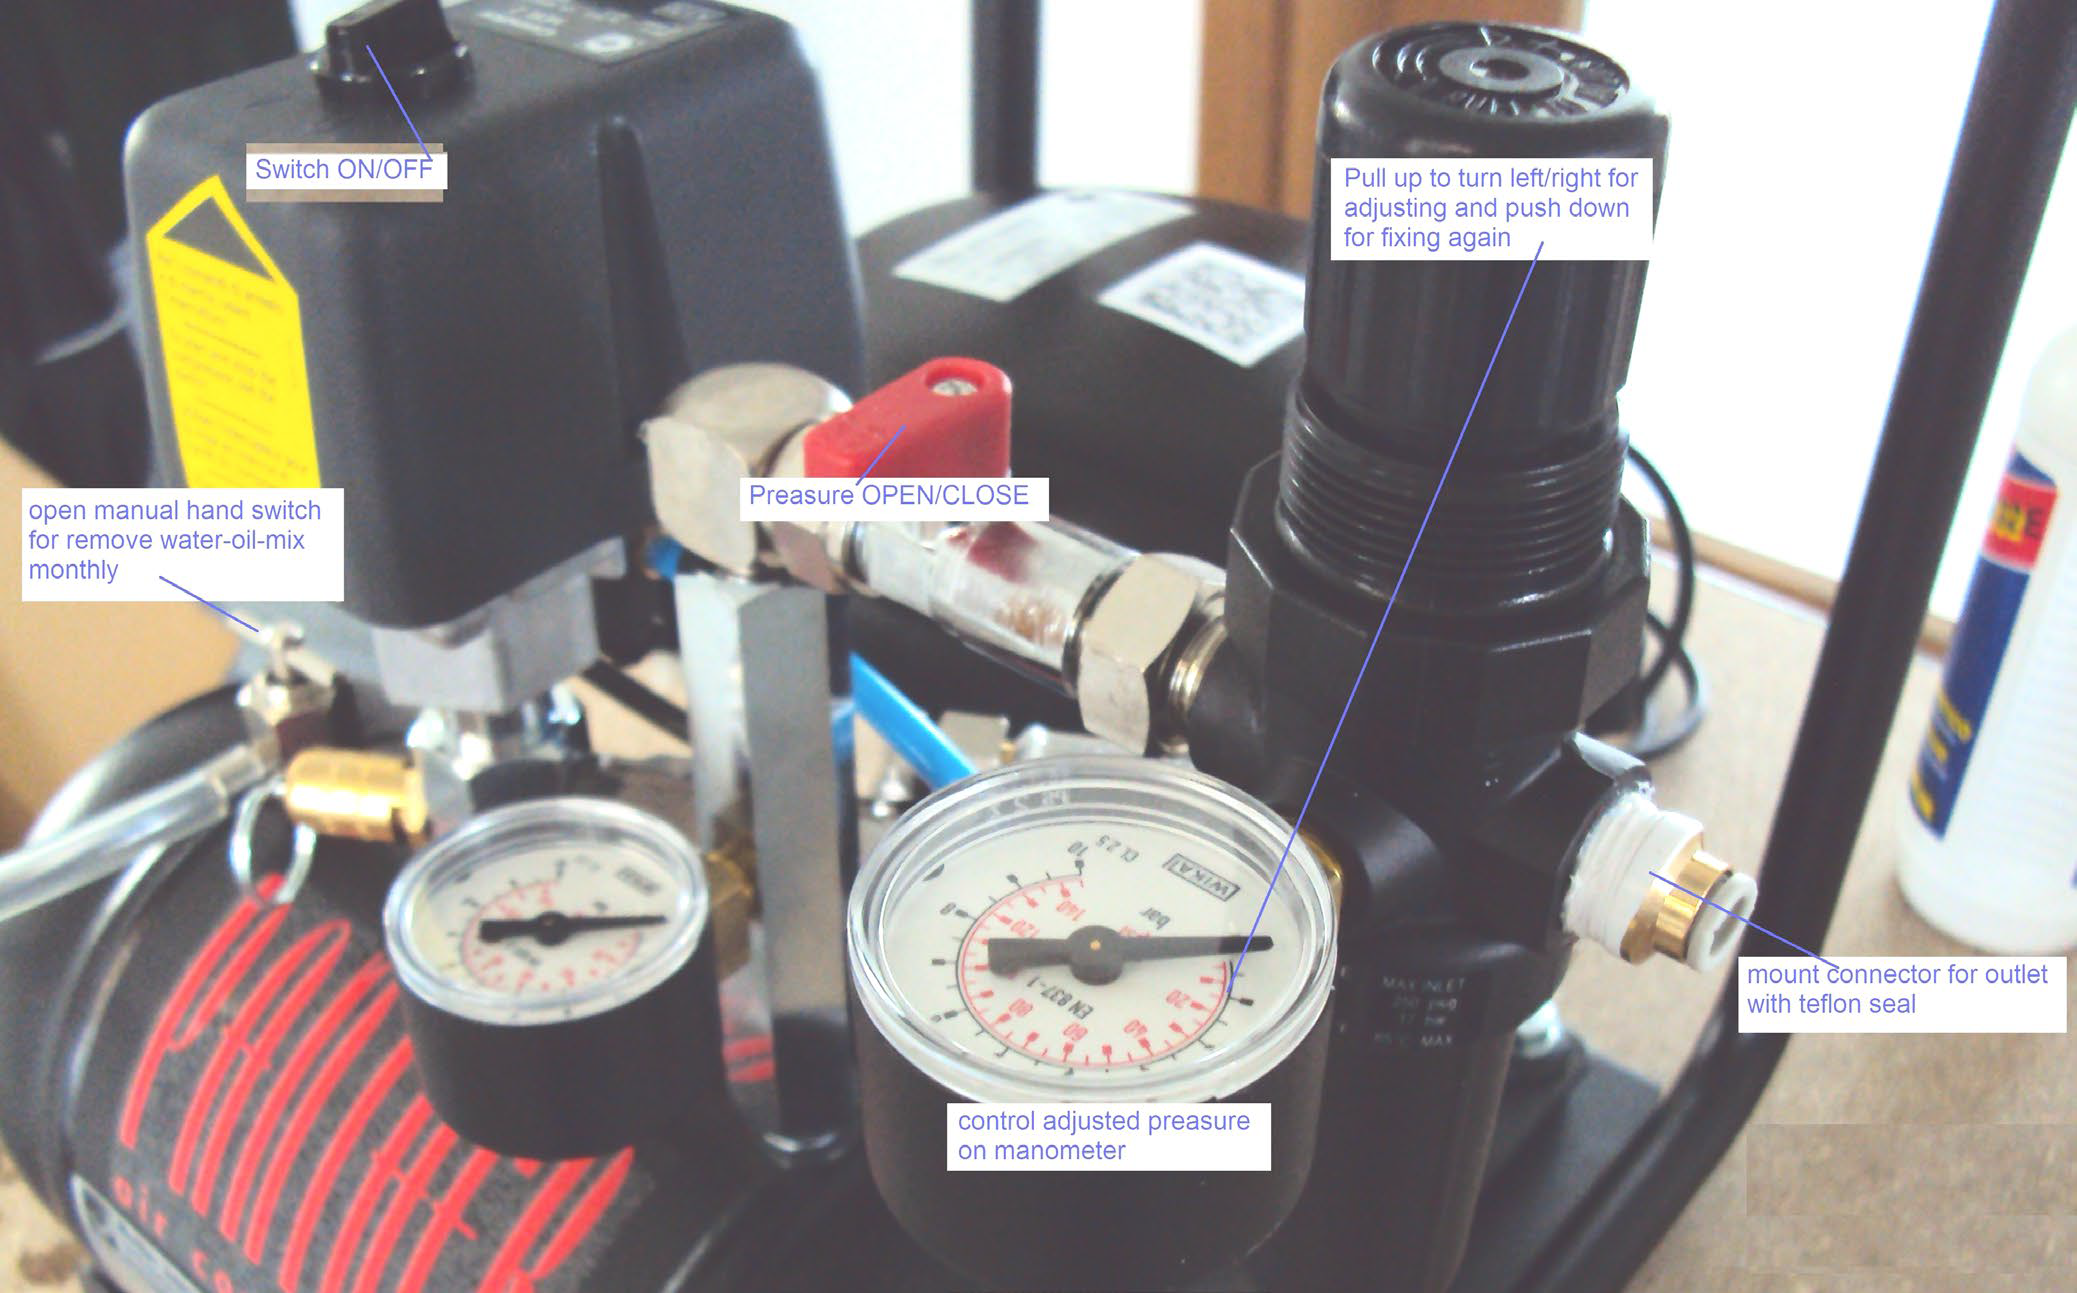
Step 4: Final Connections & Components
Refer to the front panel and component layout:
-
Power Switch: Turns compressor on/off
-
Manual Pressure Switch: Use to activate/deactivate compressor manually
-
Pressure Adjustment Dial: Fine-tune output pressure
-
Water Removal Switch: Releases built-up moisture from trap
-
Display Gauge: Shows active pressure
-
Water Trap & Pressure Adjustment Unit: Ensures stable output to instrument
-
Connect the 6mm output tube from the regulator to your instrument’s gas inlet
🔧 Maintenance Tip:
Drain the water trap regularly using the manual water removal switch to prevent moisture buildup and damage.